A kitchen remodel is a great way to increase the enjoyment and value of your home. In fact, homeowners can expect to recoup about 59% of the cost of a kitchen remodel. Begin you beginning remodeling, you must undergo a kitchen demolition. How much does it cost to demolish a kitchen? It depends on the size and how much needs to be removed. You can expect to pay from $600 for a small kitchen to close to $1,500 for a large kitchen using a kitchen demolition service.
To save money, consider handling the demolition process yourself. According to Danny Lipford, home improvement expert, “You can easily save 30% by doing the non-skilled labor yourself,” leaving you with more money in your remodeling budget.
Tearing out a kitchen doesn’t require specialized skills. The tools necessary are ones you may already own or can be rented inexpensively. But as Scott Mancha, DIY renovator at Pink Brownstone cautions, “You’re taking things apart piece by piece carefully. You’re not taking down structural things.” If you want to remove a wall or relocate appliances, you may need to consult with a professional.
DIY homeowner Jamie Novak offers this advice: “Write out a plan, a budget, and a timeline—and then add 20% to it.” The more help you get from family and friends, the shorter and easier the process, so gather up as much help as you can.
Prepare for Your Kitchen Demolition
Make sure you set up a temporary kitchen before you begin. Your temporary area should include small appliances like a microwave, crockpot, countertop burner, and coffee maker, along with some plates, utensils, cups, small pots and pans, a plastic basin, and a mini fridge.
[VIDEO: 8 TIPS TO SURVIVE IN A TEMPORARY KITCHEN]
Steps to Demolish a Kitchen
Step 1: Prep for Demo
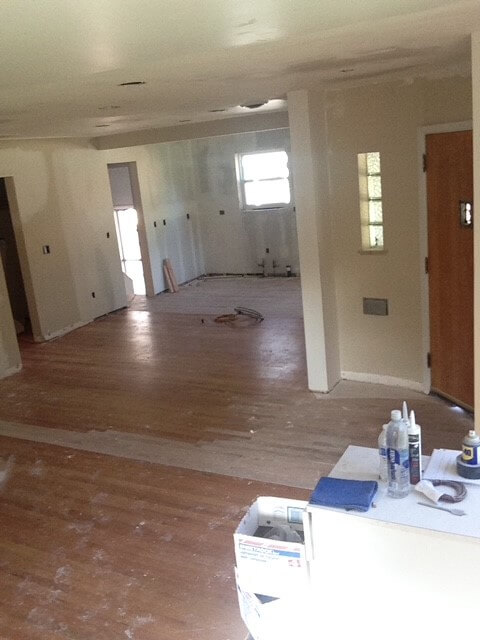
To begin, clear out the things in your cabinets and drawers, window treatments, food from your fridge, wall décor, and shelves. Cover nearby rooms with plastic sheeting and close off kitchen vents to prevent dust buildup around your house.
If you are not pulling up the floors in your kitchen, cover them with protective paper to prevent damage. Then, turn off the utilities to the kitchen—water, gas, and electric. To handle debris, rent a roll off dumpster, with delivery the day before your demo begins.
A kitchen in the middle of the demolition process. Photo Credit: Justin Mihalcin
Avoid DIY mistakes; get the proper tools. Having the right tools means that the job will go smoothly and safely. Things you will need to demo your kitchen:
Moving boxes
Sledgehammer
Hammer
Trash bags
Pry bar
Electric drill/screwdriver
Extra drill batteries
Floor scrapper
Work boots
Gloves
Face masks
Ear protection
Shop vacuum
Safety glasses
Heavy duty buckets
Furniture dolly
Step 3: How to Remove Kitchen Appliances
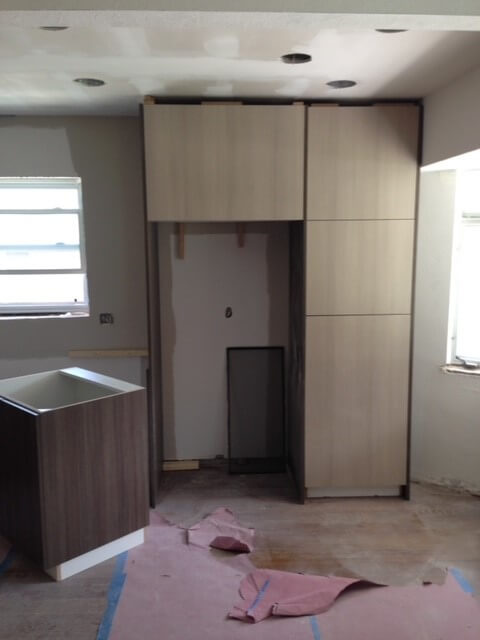
If you have appliances you’re keeping, place them in a safe area, such as a garage. If you are removing a gas stove, cap that line after disconnecting it. After disconnecting a refrigerator with an ice maker, drain any excess water before moving it.
If you are selling your appliances, coordinate pick up on or before your demo day, so they will be out of your way. If you are disposing of your appliances, contact your rental dumpster company first before tossing into your roll off, as they could be prohibited. Many communities offer alternative recycling programs for large appliances, especially those containing Freon.
An empty spot where a refrigerator used to be. Photo credit: Justin Mihalcin
Step 4: How to Remove a Countertops
For countertop removal, first remove all cabinet doors and drawers to allow for access to the undersides of the countertops. Keep a small bucket handy for small parts that you want to keep, like cabinet pulls and handles and to collect the screws and nails you’ll be pulling out.
To remove the sink, cut the silicone along the edges using a utility knife and lift it out with a pry bar. Then, use your electric screwdriver to remove the screws holding the countertop to the cabinet. These are located under the countertop and in the cabinets. With a pry bar, remove the countertop using upward pressure. The removed countertop can be cut into smaller sections for easier removal to your rental dumpster. Use a pry bar or scrapper to remove tile from a backsplash.
Use your electric screwdriver to remove the screws holding the cabinets in place. Use a pry bar to remove the cabinets if they are stuck to the wall. Removed cabinets can be cut into smaller pieces for easier disposal. Removing upper cabinets is always easier and safer with another person helping you.
[VIDEO: HOW TO REMOVE KITCHEN CABINETS]
Step 6: How to Remove Ceramic Floor Tile
To remove a tile floor, use a chisel and hammer to break apart the first few tiles, but first, remove the baseboards. Then use a floor scraper to break up multiple tiles at once. Remove any remaining mortar from the underlayment. A vinyl floor can be removed with a scraper. A heat gun can be used to loosen the tiles if the floor was installed using flooring glue.
[VIDEO: HOW TO USE A HEAT GUN TO REMOVE LINOEUM AND VINYL FLOORING]
Your kitchen space is now empty and ready for your remodeling work. Give it a final cleaning and vacuuming, collecting any loose screws and debris. A shop vac is an invaluable tool to help keep everything clean and reduce dust. Empty it often and clean out the filter as dust builds up.
Final Thoughts
When Not to DIY Your Kitchen Demo
There are times when it makes more sense to hire a professional for your kitchen demo. If you are completely unfamiliar with power tools, or you have health issues that keep you from heavy exercise, then it might be best to go with the pros. It can also take longer to demo your kitchen yourself, so hiring the demo out can get your kitchen remodel started sooner. Either way, completing the demo is an exciting step in the kitchen remodeling process and will let you come closer to your vision of the perfect kitchen for your home.
Table of Contents What is Green Building? 10 Green Building Materials to Use for Construction Projects 1. Bamboo 2. Hemp 3. Sand 4. Cork 5. Natural Clay 6. Natural Fibers 7. Ashcrete 8. Timbercrete 9. Composite Materials 10. Upcycled Building Materials Going Green is the Future Did you know that buildings account for 40% of […]
Table of Contents Why Remodel the Bathroom? Increase the Value of Your Home Lower Your Utility Costs Improve the Usability and Functionality of Your Bathroom Top 10 Bathroom Remodeling Ideas 1. Replace Flooring and Tiles 2. Redo the Shower 3. Freshen Up the Walls 4. Add Mirrors 5. Change Up Your Bathtub 6. Replace Your […]