Winter is coming...and with it comes potential property damages. Whether snow or sleet, winter weather can cause many complications to a yard. This is especially true for lawns and garden beds. No need to worry, however. There are steps that can be taken to "winterize" your yard so that your hard work won't get frozen over in one season!
There are many steps you can take for winter protection of your lawn and gardens before the first frost sets in. Learning these tips will help anyone with a winter interest in DIY projects as well. The key here is following most (if not all) of the available methods for the best results. Safeguarding plant life for extremely cold weather can often be tedious, yet it is well worth it overall.
Why Should Yards Require Winter Protection?
This is fairly straightforward. Yards, particularly plant life in them, can be very fragile in cold weather. Snow is especially the worst enemy of many lawn and garden plants. The main problem is that many property owners have no clue how to get their homes ready for a winter.
"So many homeowners don't know how to properly prepare their homes for the cold winter, especially in snowy regions," says Kris Holland, owner of Black River Landscape Management. "Taking care of a few simple things in fall can save hundreds-if not thousands-of dollars when the winter puts us knee-deep in snow and ice."
In the long run, utilizing the following methods can help homeowners save a lot of money on redoing their yards when winter passes. It's better to prepare before the first snow arrives rather than after the fact.
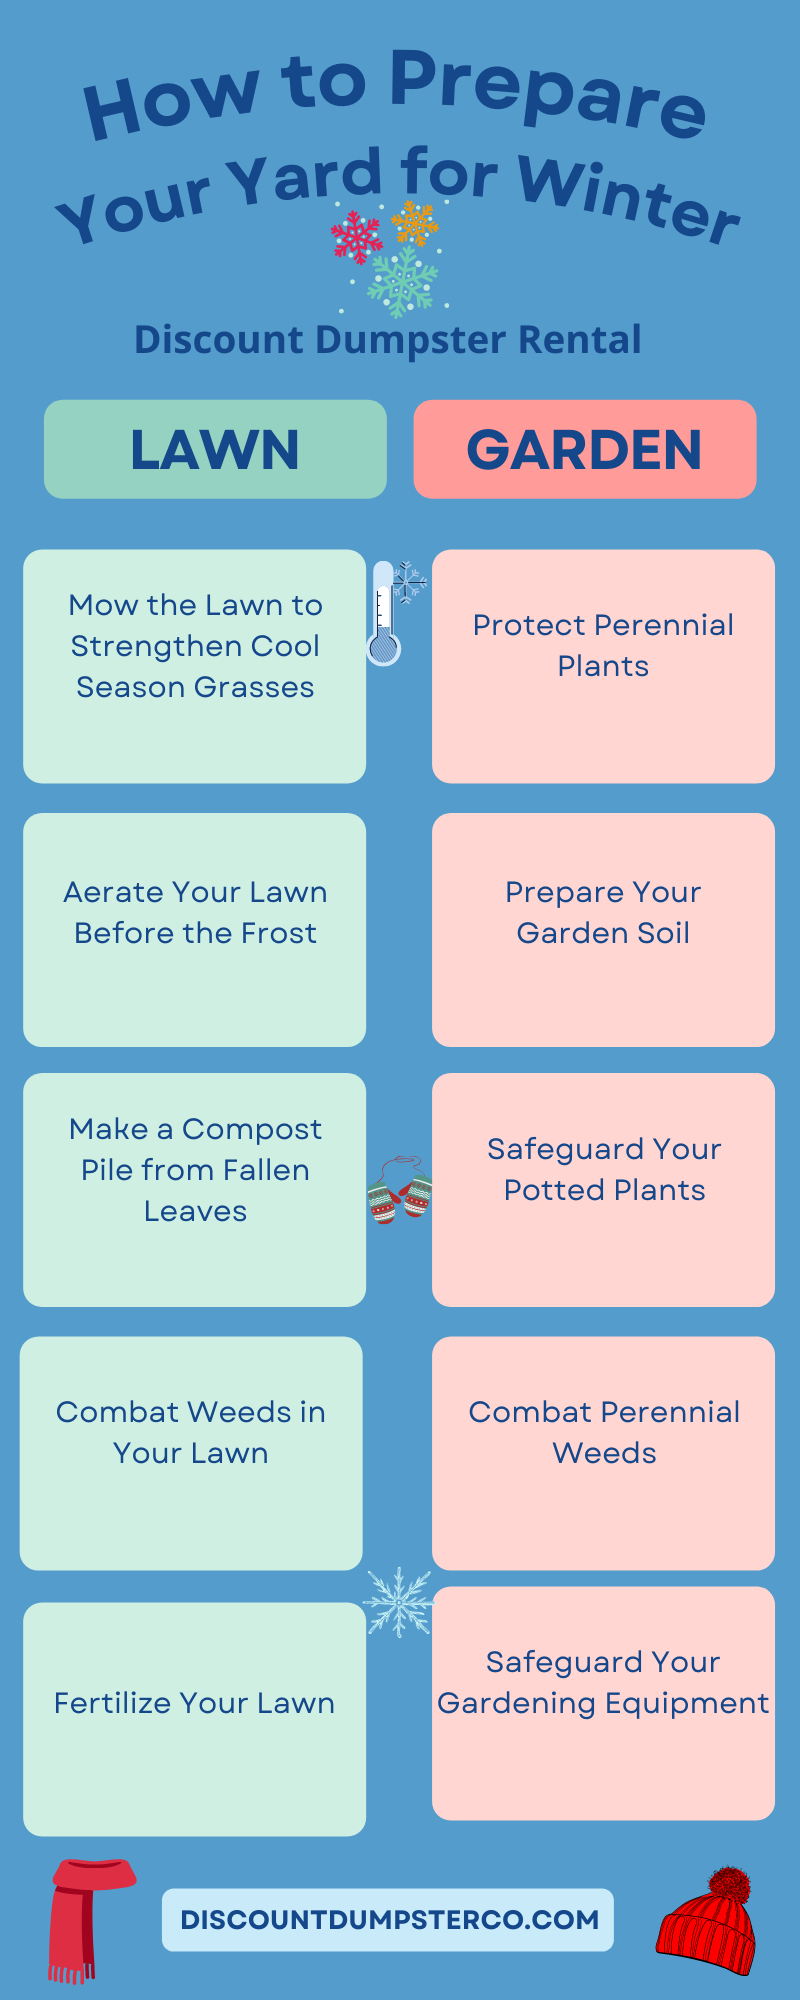
One of the first features anyone will notice about a yard is the lawn. Keeping a healthy lawn is important for the overall health of the yard. When preparing a lawn for winter weather, the following steps will be incredibly helpful.
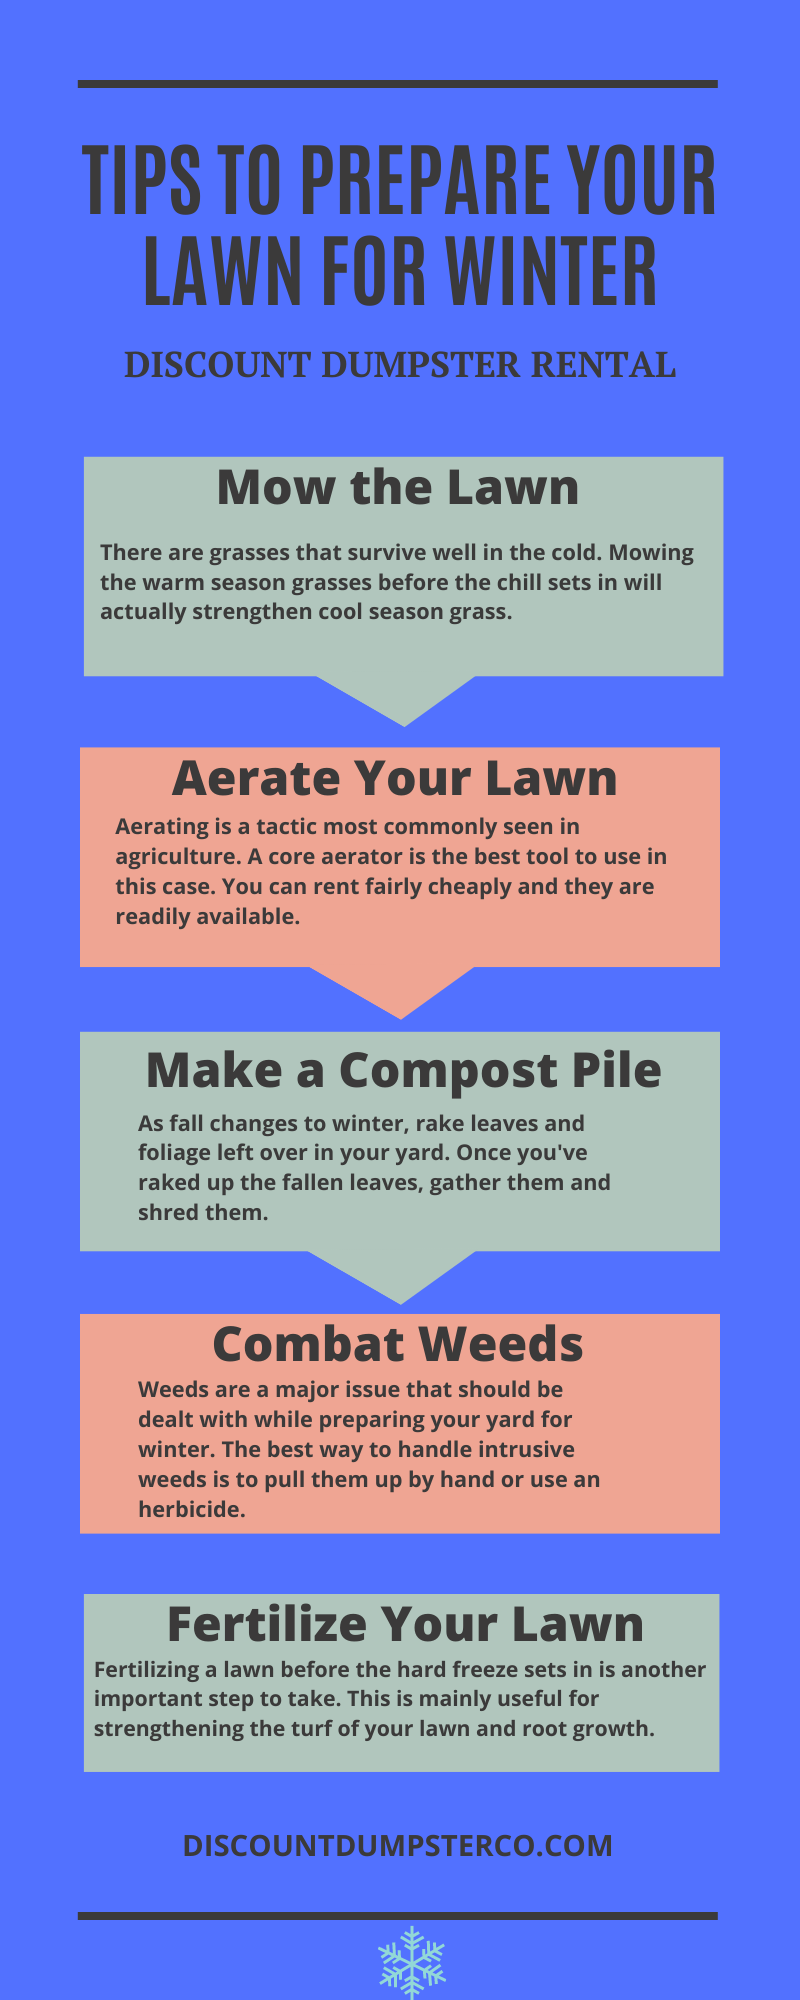
There are grasses that survive well in the cold. However, some grasses that exist on lawns are warm season grasses that will go dormant and stop growing when the weather turns cool. Mowing the warm season grasses before the chill sets in will actually strengthen cool season grass.
Be sure to cut the grass within one inch. Doing so makes the grass easier to aerate which ultimately prevents many complications. Start the process before the ground freezes and keep a regular mowing schedule for a few days before the cold arrives.
2. Aerate Your Lawn Before the Frost
Aerating is a tactic most commonly seen in agriculture. Farmers use the tactic for irrigation purposes, yet it can also protect your lawn from winter. A core aerator is the best tool to use in this case. You can rent one fairly cheaply and they are readily available. This can be done in the spring, yet fall is the perfect time. Fall rains provide food for plant roots and other beneficial organisms.
One thing that can strengthen aeration is the use of a compost pile. Leaves from compost can cover the aeration holes effectively, leaving no room for potential soil damage.
3. Make a Compost Pile from Fallen Leaves
As fall changes to winter, rake leaves and foliage left over in your yard. A leaf blower can help as well. Once you've raked up the fallen leaves, gather them and shred them. Shredded leaves create an excellent mulch for compost piles.
The organic matter not only fills bare spots left behind from aeration, but also gives nutrients to plant life for the next growing season. Spread your compost around the yard as much as possible, especially if you've aerated the grass.
4. Reseed Bare Spots in Your Lawn
Fall is one of the best times of year to reseed a lawn. The cool weather and moisture provide the perfect climates to reseed lawns for grass and other plants.
Loosen the soil of your lawn while spreading grass seed evenly. Afterward, cover the seeded areas with mulch to protect all plants roots. This also prevents infestation from pests and other scavengers that try to eat your seed heads.
5. Combat Weeds in Your Lawn
Weeds are a major issue that should be dealt with while preparing your yard for winter. The best way to handle intrusive weeds is to pull them up by hand or use an herbicide.
Weeds will harm the health of a lawn by siphoning nutrients away from plants that you want to survive. This can't be emphasized enough; don't ignore the weeds in your lawn. They will cause way more harm than good in the long-run.
6. Fertilize Your Lawn
Fertilizing a lawn before the hard freeze sets in is another important step to take in protecting your lawn from winter. This is mainly useful for strengthening the turf of your lawn and root growth.
Pelletized lime is a useful add-on for fertilizers if you want to take that extra step. However, a soil test may be necessary to determine if the fertilizer won't harm your soil nutrients. Soil tests are fairly inexpensive and aren't too time consuming.
Tips to Prepare Your Garden Beds for Winter
Lawns are not the only important aspect of a yard. Many homeowners have gardens in their yards, which also need special protection from freezing temperatures. Garden plants tend to be more fragile to winter than grass and other naturally growing lawn plants.
Much like the lawn, there are steps that can be taken to safeguard your gardens. By following the necessary tips, you can rest assured your flowers and other garden plants will have a better chance in extreme cold.
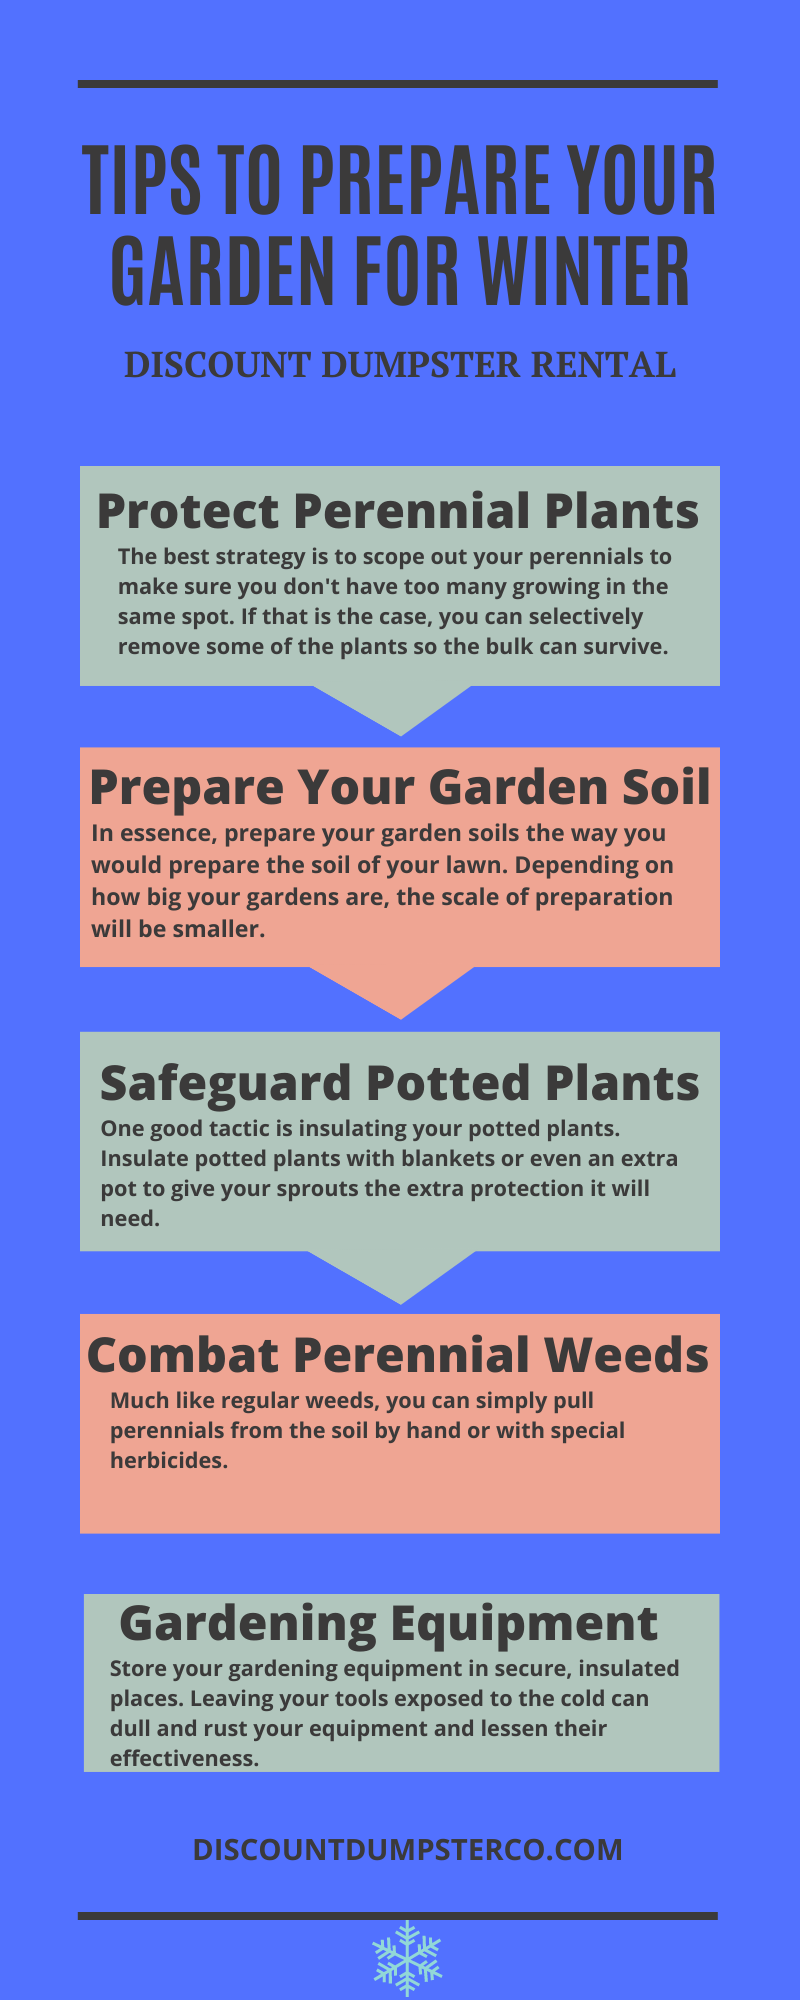
Perennials can live for more than two years. These are plants that, while can live much longer, can also be more delicate to changes in weather. Sometimes, you may need to even out the number of perennials growing in your garden. More plants means the more competition for nutrients, which lessens the probability that most of the plants will survive the cold.
The best strategy is to scope out your perennials to make sure you don't have too many growing in the same spot. If that is the case, you can selectively remove some of the plants so the bulk can survive.
2. Prepare Your Garden Soil
Preparing garden soil for winter is similar to prepping your lawn. Compost piles can preserve soil nutrients combined with fertilizing and aeration.
Another strategy is utilizing a cover crop. A cover crop is a temporary plant grown seasonally to safeguard bare spots on patches of soil.
In essence, prepare your garden soils the way you would prepare the soil of your lawn. Depending on how big your gardens are, the scale of preparation will be smaller. However, the tactics are still the same fundamentally.
3. Safeguard Your Potted Plants
The important aspect of potted plans is the roots. Leaves and stems go dormant during winter, but roots will not. Therefore, the roots have to be preserved so the plants can resume growth as the weather warms. It would certainly be a huge disappointment to see all your hard gardening work whither and die before the next growing season.
One good tactic is insulating your potted plants; they can be very susceptible to major temperature swings. Insulate potted plants with blankets or even an extra pot to give your sprouts the extra protection it will need.
4. Combat Perennial Weeds
Weeds are always a major pain for lawns and gardens. One of the biggest pains are perennial weeds. These weeds can live for more than two years and are more intrusive than non-perennial weeds. Because they live so long, hoping for them to whither away is not a good option.
Much like regular weeds, you can simply pull perennials from the soil by hand or with special herbicides.
Don't ignore these pests. They affect the overall health of your garden.
5. Safeguard Your Gardening Equipment
Store your gardening equipment in secure, insulated places. Leaving your tools exposed to the cold can dull and rust your equipment and lessen their effectiveness.
The key is to have your equipment ready to go once the weather warms. You won't need your garden tools for the winter, yet you want to have your equipment spick and span as spring and summer roll around.
Prepare Your Yard with a Roll Off Dumpster
One way to get your yard ready for winter is renting a roll off dumpster. If you have major yard preparation, a dumpster provides easy access to regular waste disposal. Rather than have mountains of trash bags, yard waste can easily be placed in one convenient location.
A 10-yard dumpster is perfect for yard projects. The main benefit is the convenience it offers. Rather than rely on your normal garbage collection (which may not accept some yard waste) or a junk hauler, having your own dumpster puts you in control of your work.
If you value your yard and wish to see it thrive, taking necessary steps is crucial. It's better to be safe than sorry so your efforts aren't wasted with one harsh winter season!
Table of Contents Why is Guestimating Important? What Kind of Roofing Tools Do You Need? How Many Bundles Should You Buy? 1. Asphalt 2. Metal 3. Tiles 4. Wood 5. Solar Shingles Know Your Bundles Your roofing materials are vital to your home’s structural integrity and the safety of the building. You want it to […]
Table of Contents Why is Window Removal Necessary? More Energy Savings Greater Comfort and Security UV Protection Increased Home Value How to Remove Windows Properly 1. Inspect Your Windows 2. Remove the Sash Weights and Stops 3. Remove Paint 4. Repair Any Cracks 5. Prepare the Surface 6. Install Flashing Tape 7. Install the Window […]