When we first moved into our new home, most of the flooring surfaces were covered with carpet. Not just any carpet—pink carpet. We knew our budget couldn’t afford the hardwood floors we were hoping for.
We turned to an inexpensive alternative - linoleum flooring. Linoleum flooring is a popular classic choice for flooring in American homes. Both vinyl flooring and linoleum are types of resilient flooring. Most homeowners like this type of flooring because it is easy to work with, retains its shape, and is less expensive than wood or tile options.
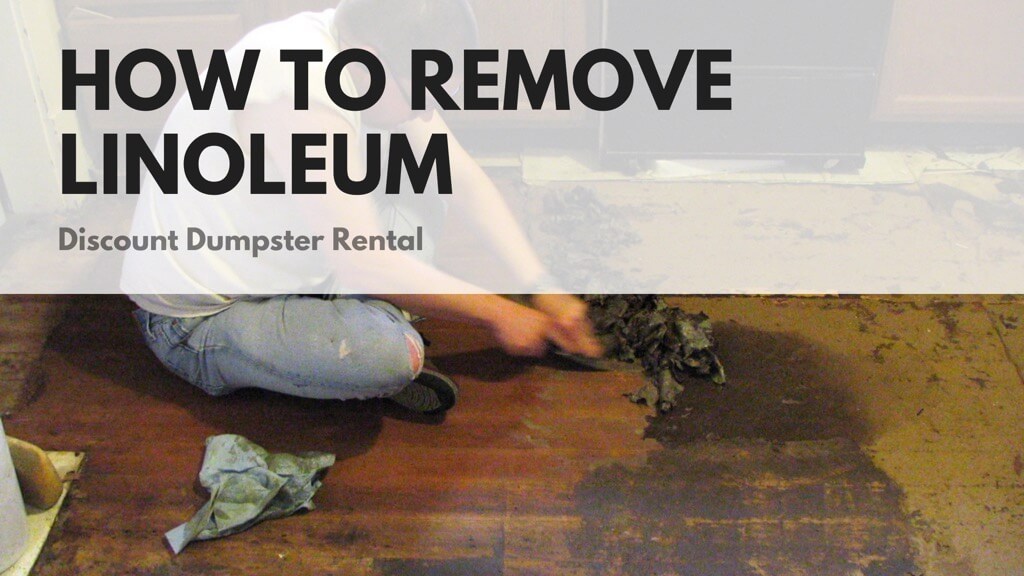
It wasn’t too long before we were ready to remove the linoleum topper and finally get our hardwood floors. Removing linoleum or vinyl floors does not require any special skills; it was a good DIY project for us (it was fairly easy).
We were able to save money on the cost of removal. It gave us more wiggle room in our budget to spend on our forever-floors. Replacing linoleum with a brand new floor can improve the aesthetics of a room, especially if the linoleum or vinyl is damaged, stained, or outdated.
Taking out old linoleum flooring can be challenging to remove; the adhesive strengthens over time. A wooden subfloor is porous and may have absorbed the adhesive. This adhesive must be completely removed before the installation of a new floor. But it is a straightforward job for the average DIY homeowner.
Continue reading to learn how to remove linoleum to prepare to install new flooring.
Safety Considerations When Removing Old Linoleum Flooring
Prior to 1980, many vinyl and linoleum manufacturers added asbestos into their products. The addition of asbestos made the vinyl stronger and offered insulating benefits. Asbestos-containing vinyl products were standard in commercial construction due to its fire-resistant properties. These products were versatile and inexpensive. They were used extensively in home and business construction.
While there are no U.S. linoleum producers that use asbestos fibers today, you may encounter it as you remodel an existing home or building. You are not able to detect the presence of asbestos by sight. If you are working with any materials installed prior to the 1990s, you should assume they may contain asbestos. Keep this in mind before you remove linoleum or vinyl flooring.
If you suspect asbestos in your flooring, consult with a licensed abatement professional. They can test the floor for asbestos. If it is found to be present, they can also consult with you to determine the best disposal method.
If you do not want to bother removing the linoleum, you can lay a floor over the old existing top layer floor as long as there is no damage and it will not be sanded during the process. This will raise your flooring about an eighth of an inch. This is not generally a problem unless it causes the floors to be uneven with an adjoining floor which could cause a trip hazard. In this case, it is probably best to remove the floor completely before the installation of a new floor.
Before you begin your home project, clear the room of all furniture, appliances, and other items on the existing floor.
Cover with Plastic Sheets
Place plastic sheeting in the doorways between the room you’re working in and adjoining rooms.
Remove the Baseboards
You will need to remove the baseboards or other trim around the room, as they cover the edges of the linoleum. Cut through any paint joining the wall and the baseboard.
Insert a thin pry bar between the wall and the top of the baseboard. Tap the top of the pry bar with a rubber mallet to begin to loosen the baseboard from the wall. Gently pull the baseboard away from the wall, taking care not to break or snap the baseboard. The baseboard should pop out fairly easily.
If you will be reusing the trim, mark the back of each piece so that you will know where it goes during reinstallation.
Share this infographic explaining how to remove linoleum floors.
How to Remove Vinyl Flooring or Linoleum Flooring Material
Start at the Center
Very often, vinyl sheet flooring is installed with adhesive only along the edges, referred to as perimeter installation. This means that the center of the flooring is not fixed onto the subfloor. Because of this, it is easier to begin removing the floor from the center of the room.
Cutting the Floors
Begin by using a utility knife to make a straight cut down the center of the floors. Then make a parallel cut about 12 inches away from the first cut. Cut through the ends to create a strip of vinyl. Roll up the vinyl strip and then continue across the room, cutting and removing strips of vinyl. Once you get to the glued sections, use a scraper to loosen the vinyl. Once the vinyl is removed, you can remove any residue with the scraper.
If the linoleum is in tile sections, cut through a tile with the utility knife and use a putty knife to loosen the edge. Once you have a tile removed, you can use the scraper. Insert the scraper under each tile edge to loosen and then push up the tile. A heat gun works well to loosen individual tiles for easier removal.
The top layer comes off relatively easily. Once this layer of your vinyl or linoleum flooring is removed, you will be left with a layer made of paper backing and linoleum glue. Use the floor scraper to get up as much of the glue as you can. Work in small sections, pushing the scraper forward in short strokes at a 45-degree angle. This part of the job can be tiring, so be sure to work in plenty of breaks.
If the remaining glue is stubborn to remove, you can use a heat gun to loosen remaining residue; removing adhesive will be much easier. If you don’t own a heat gun, you can rent one or you can use a large hair dryer. Work with a small section of floor. Hold the heat gun about three inches from the surface of the old floor. Don’t let the heat gun directly touch the glue layer. Once the adhesive is softened, scrape it up with a putty knife, working at a 45-degree angle. Work through each section until all of the adhesive is removed. As you remove the flooring, take care not to damage the subfloor. When cutting and scraping, do not use excessive force or gouge the plywood underlayment.
If there is a concrete floor beneath the linoleum, you can loosen and scrape up any remaining adhesive using a hot water method. Pour some boiling water over a few towels in a large bowl. Press the hot towels onto the floor until the adhesive is soft. Use a floor scraper to easily remove the adhesive. Do not use this method on a subfloor made of wood, as it can cause the wood to warp.
Disposal of Removed Linoleum Flooring Material
Removed linoleum flooring is heavy and bulky. You usually cannot dispose of it in your regular trash collection. Renting a dumpster makes it easy to handle this debris. With a dumpster on-site, you can toss the flooring debris as you go, keeping your work area and home clean and safe. If you are completing another remodeling, you can use your rental roll off dumpster to get rid of other construction or remodeling waste at the same time.
Final Thoughts on Linoleum Removal
Removing a linoleum floor is not a difficult task, but does take some patience. By working in small sections, you will be able to tackle the removal of this type of flooring easily. Once the flooring is removed, inspect your subfloor for any signs of damage. Replace any sections that are water damaged, creaking, splitting, or rotting. You will then be ready for installation of your new floor and a whole new look for your room.
Table of Contents Complications of Medical Waste Disposal How to Dispose of Medical Waste 1. Segregation 2. Storage 3. Transportation 4. Treatment 5. Disposal 6. Documentation Recycling Efforts for Medical Waste From blood draws to throat swabs to surgeries, many medical procedures result in medical waste. Healthcare providers know the risks involved with improper handling […]
Table of Contents Why You Need Storage for the Big Move? Security Organization Convenience Flexibility Cost-effectiveness The Best Storage Containers for Moving 1. 1-800-PACK-RAT 2. PODS (Portable On-Demand Storage) 3. U-Haul U-Box 4. SMARTBOX 5. Zippy Shell Storage Containers are Useful for Big Moves Moving can be a daunting task, especially when dealing with the […]